Welcome to RISC OS
RISC OS was officially released in 'beta' for the Raspberry Pi, as 'release candidate 6' (RC6) on 1st November 2012. Changes to the start-up firmware provided with recent Raspberry Pi boards (the software that starts up the board before RISC OS is invoked) has required a change to the RISC OS ROM and the latest beta release is RC11. RC8 differs from RC6 only in the ROM image and firmware - the RISC OS software and boot structure is unchanged. RC11 is based upon the new HardDisc4 image (02-Jun-2013) with many updates, including those required for RISC OS 5.2x and some updated applications.
The beta distribution of RISC OS is completely self-contained, occupying about 250Mbytes of storage on the SD card (including the ROM) leaving some 1625Mbytes free. It is distributed in the form of a zipped SD card 'image' - 103Mbytes to download and it unzips to a file 'riscos-2013-07-10-RC11.img' 1876Mbyes in size. It is thus suitable for SD cards of 2Gbytes and above and may be written to them using Win32DiskImager. It will start up very swiftly into a fully functioning desktop. The first time it starts up, the default browser, NetSurf, will do some font-scanning and a 'welcome' page will appear on screen. The first thing it mentions is about networking: the few and simple steps required to get network access going if you have an Ethernet cable plugged in.
The RISC OS desktop you see on start up contains a 'welcome' page introducing itself, as well as some icons on the desktop and a 'RISC OS Pi' backdrop image. It is at a resolution of 1920x1080 but the GPU on the Raspberry Pi will automatically downscale it, if necessary, to match the capabilities of the monitor you have attached via the HDMI socket. If your monitor can only handle a lesser resolution, then RISC OS can be set to match it (see below). This method of screen handling may be unfamiliar but it will be explained below.
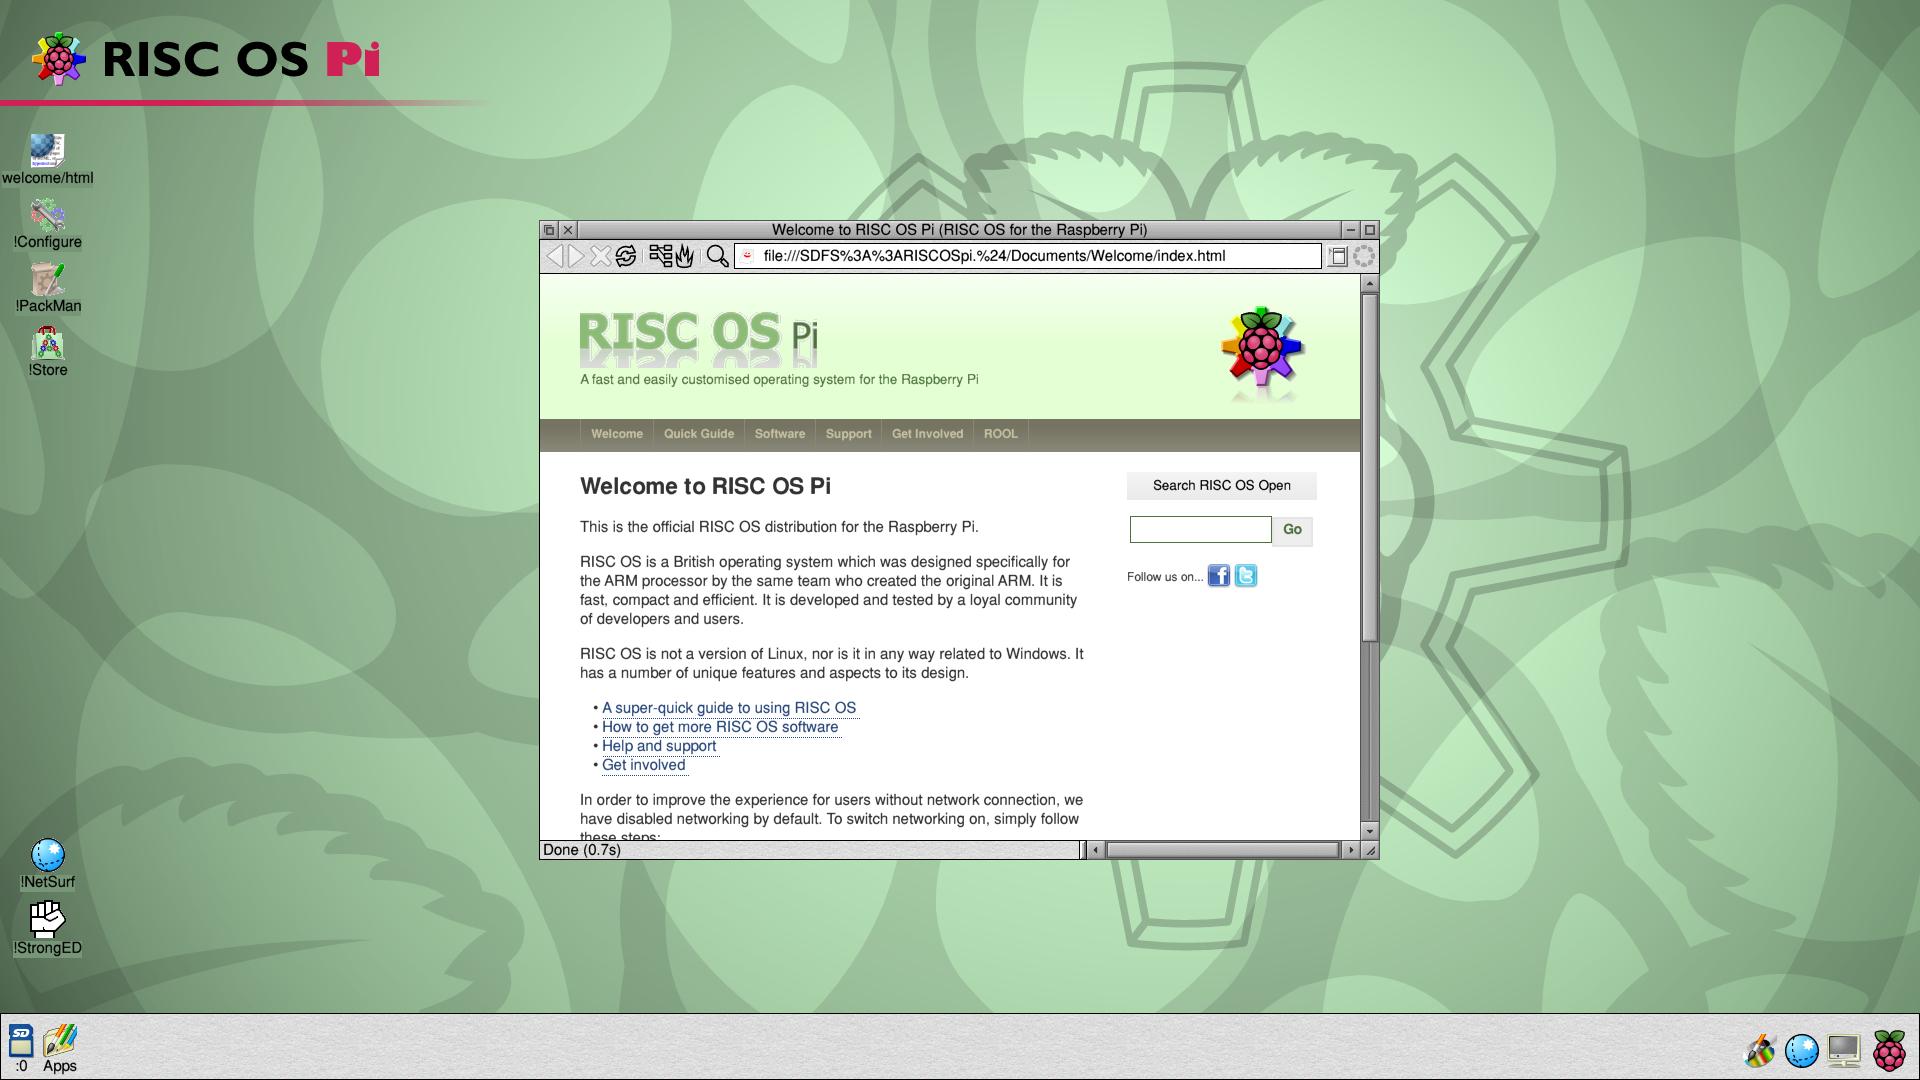
What you should see on the first start up
The icons on the desktop backdrop are links to execute selected applications (which can be generated by simply dragging a favourite application from a file window to the backdrop). From top to bottom, the action taken if you double click with the left hand mouse button ('SELECT') is as follows:
- welcome/html - open the 'Welcome' page
- !Configure - open a window showing the configure 'plug-ins'
- !PackMan - run the package manager to look for updates etc.
- !Store - run the 'plingstore' application to load software
- !NetSurf - run the default browser
- !StrongED - run the editor 'StrongED'
If you close the 'Welcome' page, follow the instructions to set up networking and click over the icon marked 'SD' with the text ':0' below it, a window will open showing the contents of the SD card partition reserved for RISC OS. If you click over the icon 'Apps' and then double-click over the icons '!Help' (which will place its own icon on the right hand side of the iconbar, an 'i' inside a blue box) and '!Paint' (its icon is a paintbrush over a rainbow palette) you will get the screen below:
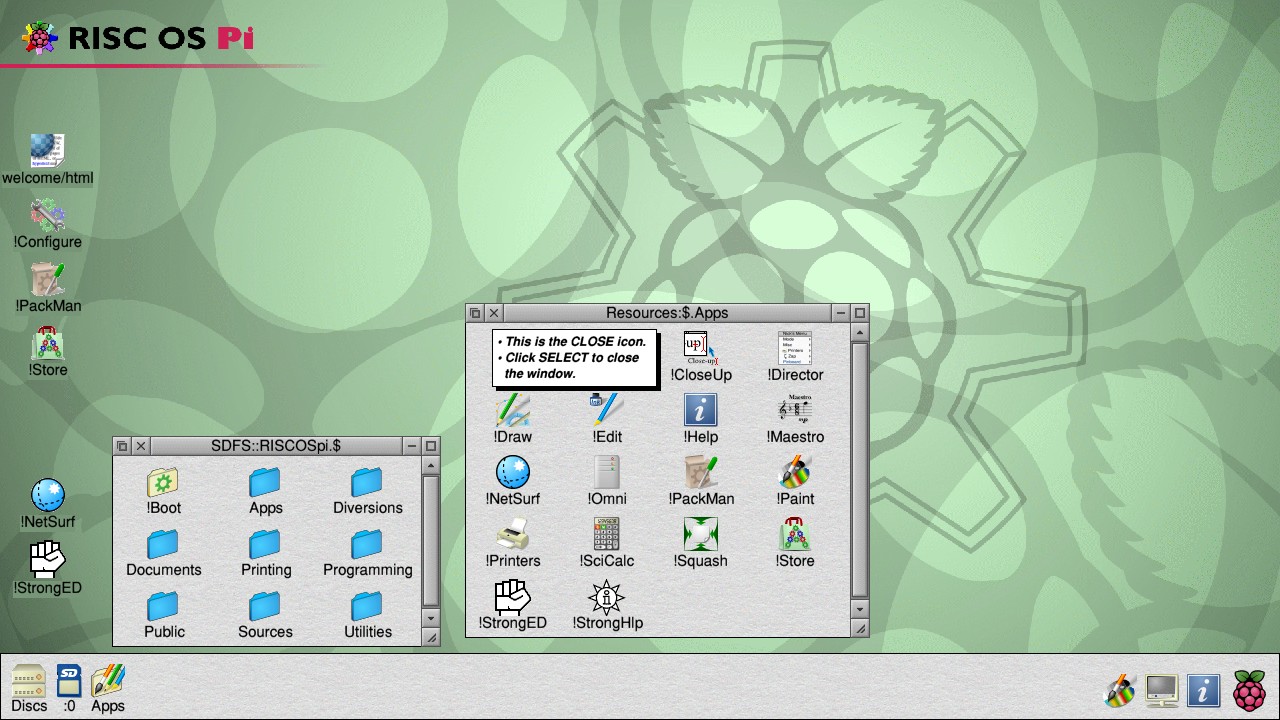
What you should see after clicking over the 'SD' icon and running !Paint and !Help
The '!Paint' and '!Help' icons have joined those already on the iconbar - the blue circle is for NetSurf, the browser. Thus you can see all the running applications - by their icons on the iconbar - whether or not they have any windows open. This is different from some other operating systems which place icons on the iconbar only when the application concerned has a window open on the desktop. There is another difference - one window on the desktop will have the 'input focus' (and show a text cursor where appropriate) and, quite separately, one window will be 'on top'. You can give the input focus to a window by clicking over its work area and you can bring a window to the top by clicking (with 'SELECT') on its title bar.
You can play with dragging windows around - with the one on top staying on top if you use the ADJUST button to drag them.
In the screenshot above you can see that the interactive !Help application is explaining that the mouse is pointing to the 'close' icon of the Apps window. This help is provided by the application and explains the function of any icon or option in the window. If you click the centre button of the mouse (called 'MENU') you will get a context-sensitive menu with options. Note other systems use the right button for this purpose: on RISC OS the right hand mouse button is called 'ADJUST' and usually performs a similar role to the left hand button (called 'SELECT') with subtle differences. For example dragging a window around with SELECT also brings it to the top. Dragging it around with ADJUST keeps it at the same level so it may move underneath other windows if they are 'higher' than it on the desktop. The !Help application will explain what each selection from the menu does as well.
Applications
Ordinary directories appear in a filer window as a folder icon (which shows as an open folder if it has been opened to show what is inside it). Files appear as an icon indicating their contents (a text file appears as a pen with lines of writing). Inside the Apps folder are some slightly different icons - with names starting with a "!". If you double click on these, an application will start. These are application directories.
Application directories will contain some particular files such as '!Run' (which tells it how to execute itself) and possibly '!Help' (which tells you how it works) - see below for an example:
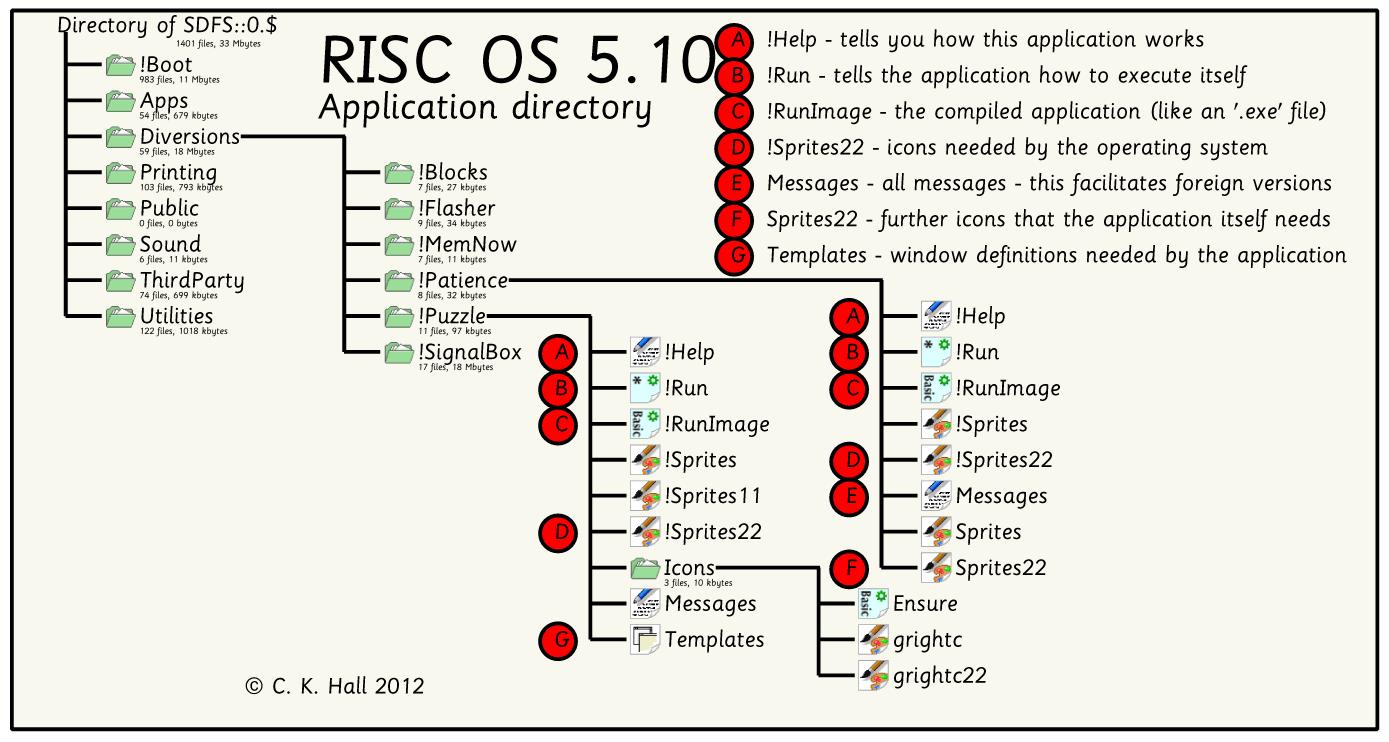
Contents of a couple of application directories
The iconbar
The icon to the far right of the iconbar is the 'switcher' icon. If you click over this icon with SELECT, you will see a list of running applications with the memory space they occupy. As each application is given a chance to 'do its thing' it is paged into memory at a fixed address, offered the chance to do some processing, and it hands control back to the system when it has done its next operation (whatever that is). If it is a time-consuming operation it will display an hourglass indicating that it is hogging the system.
To quit an application, select MENU over its icon on the iconbar and select the option 'Quit'. This prompts the application to remind you if you have not saved a file you were editing before it shuts down.
Dragging & opening files
With a directory window open on the desktop you can drag a file (or directory) onto the desktop and it will 'stick' there. Clicking over it then has the same effect as if clicking over it in the directory window. A double-click on a file (or dragging it onto an empty part of the iconbar) causes it to be 'run' using the application which normally loads a file of that type, starting it up if it is not already running. This 'drag and drop' method is different from other systems.
A 'zip' file is an example of a file that contains a package of other files. Under RISC OS such 'image filing systems' work very simply: double click over them and you just get a filer window showing what is inside, exactly as if it was a directory on a disc. SparkFS works in this way - the bundled version is read only so it will prevent any changes being made to files in the zip archive but a full version is available.
Files stored on different storage devices are differentiated by filesystem and by the device on that filesystem. This replaces the arbitrary allocation of drive letters seen on some systems. The title bar of a filer window shows the full pathname and will be something like:
SDFS::Disc0.$.Directory.File or
CDFS::THISCD.$.Directory.File/xtn
When referencing files this is the preferred (full) form used by the Wimp.
Input focus
With several application windows open on the desktop only one will have the 'input focus' allowing you to type information into it. To indicate this its title bar will be pale yellow with the others being pale grey. Only if the application has a text input capability can it be active in this way. Quite separately the windows are stacked so that the one on top covers any underneath. Any application (whether or not it is 'active' in terms of having the input focus) will provide a context-sensitive menu anywhere in any window it owns: hence wherever you are on the desktop or iconbar an appropriate menu of choices will be offered for selection. Menus therefore do not drop down from a window's title bar.
Configuring the machine
If you double-click over !Boot it will offer you a choice of different aspects of the computer to configure. Such things as keyboard repeat rate, what to include in the 'Apps' folder etc. may be chosen. These changes will either be applied immediately or after the next re-boot.
Last but not least RISC OS displays text on screen using anti-aliasing. This is a device to make text readable when displayed on a medium with less resolution than would be required to show the shapes exactly. It makes small text on screen readable by using a range of shades for each pixel. An example below illustrates this using the CloseUp application (and an even further magnified image)
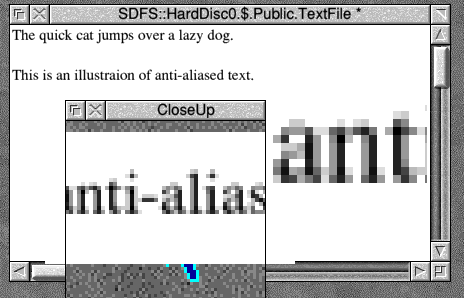
What that readable text actually looks like when magnified